Posts

Showing posts with the label renaissance

Project Photos: Suede Boots

Image
This pair of suede boots was one of the major projects that made up my renaissance faire outfit. It was my first time making shoes of any kind, but they still turned out fabulous and warm! I had a lot of inspiration that went into the final design and I put it all together in a pinterest board  that is still growing.  The main sources that influenced the final design: This pattern was the initial pair of boots that I was going to make, but I have very short legs and wide width feet. That would have basically meant distorting the pattern and doing a load of trial and error to get them to fit, but the simple turnshoe and tongue style were something I did want to incorporate in my finished shoe. So I looked around online to see how to make a boot that actually fit an individual person's foot. This tape mold method was the way that sounded the best to me to get a custom fit while still hanging on to the style of the first boot pattern I liked. And I pick...

Italian Renaissance Dress

Image
So it has been rather quiet of late on this blog, but not because I haven't been sewing, crafting, and designing. Actually I have been doing too much to have time to share. November 21st and 22nd my friends and I attended a renaissance faire in Louisiana, and I made a dress and boots for me as well as a jacket for my friend. Hopefully, there will be a post for each one starting with the dress :) So I basically went all out when designing this outfit. The base fabric is a wine colored broadcloth, and the underskirt is a navy satin. The undersleeves are organza with the gauntlets made of the same material as the dress. It is embellished with four separate gold colored brocade trims, gold stitching, and glass pearls. The woven trim on the edge of the overskirt is gold tone with pearls. The gauntlets are held in place with brass lion head buttons, and the lacing rings are fancy brass leaves. There is also a matching snood with some more of those glass pearls on it. I also w...

Project Photos: Modified Butterick 4827 dress

Image
This is my outfit for the ren faire. I started out with the Butterick 4827 pattern, but I got rid of the princess seams and back lacing and replaced them with side lacing. Otherwise I went by the pattern on both the dress and the underskirt. The dress is made from a navy satin and the underskirt is a lovely brocade. The finished dress with the underskirt hanging up behind. It has always been one of those things that I wanted to try making, but it was a bit more difficult than I expected. First off, I couldn't find any tutorials on how to put together a side lacing dress. This meant that I was pretty much on my own design wise. What I've come up with does leave an opening in the arm scythe above the lacing, and a bit of my white chemise will show through. The fit through the shoulders gets a bit weird, but I'm not sure if that has more to do with my alterations or the original pattern since I really only altered the seam lines on the side of the dress. Dress bef...

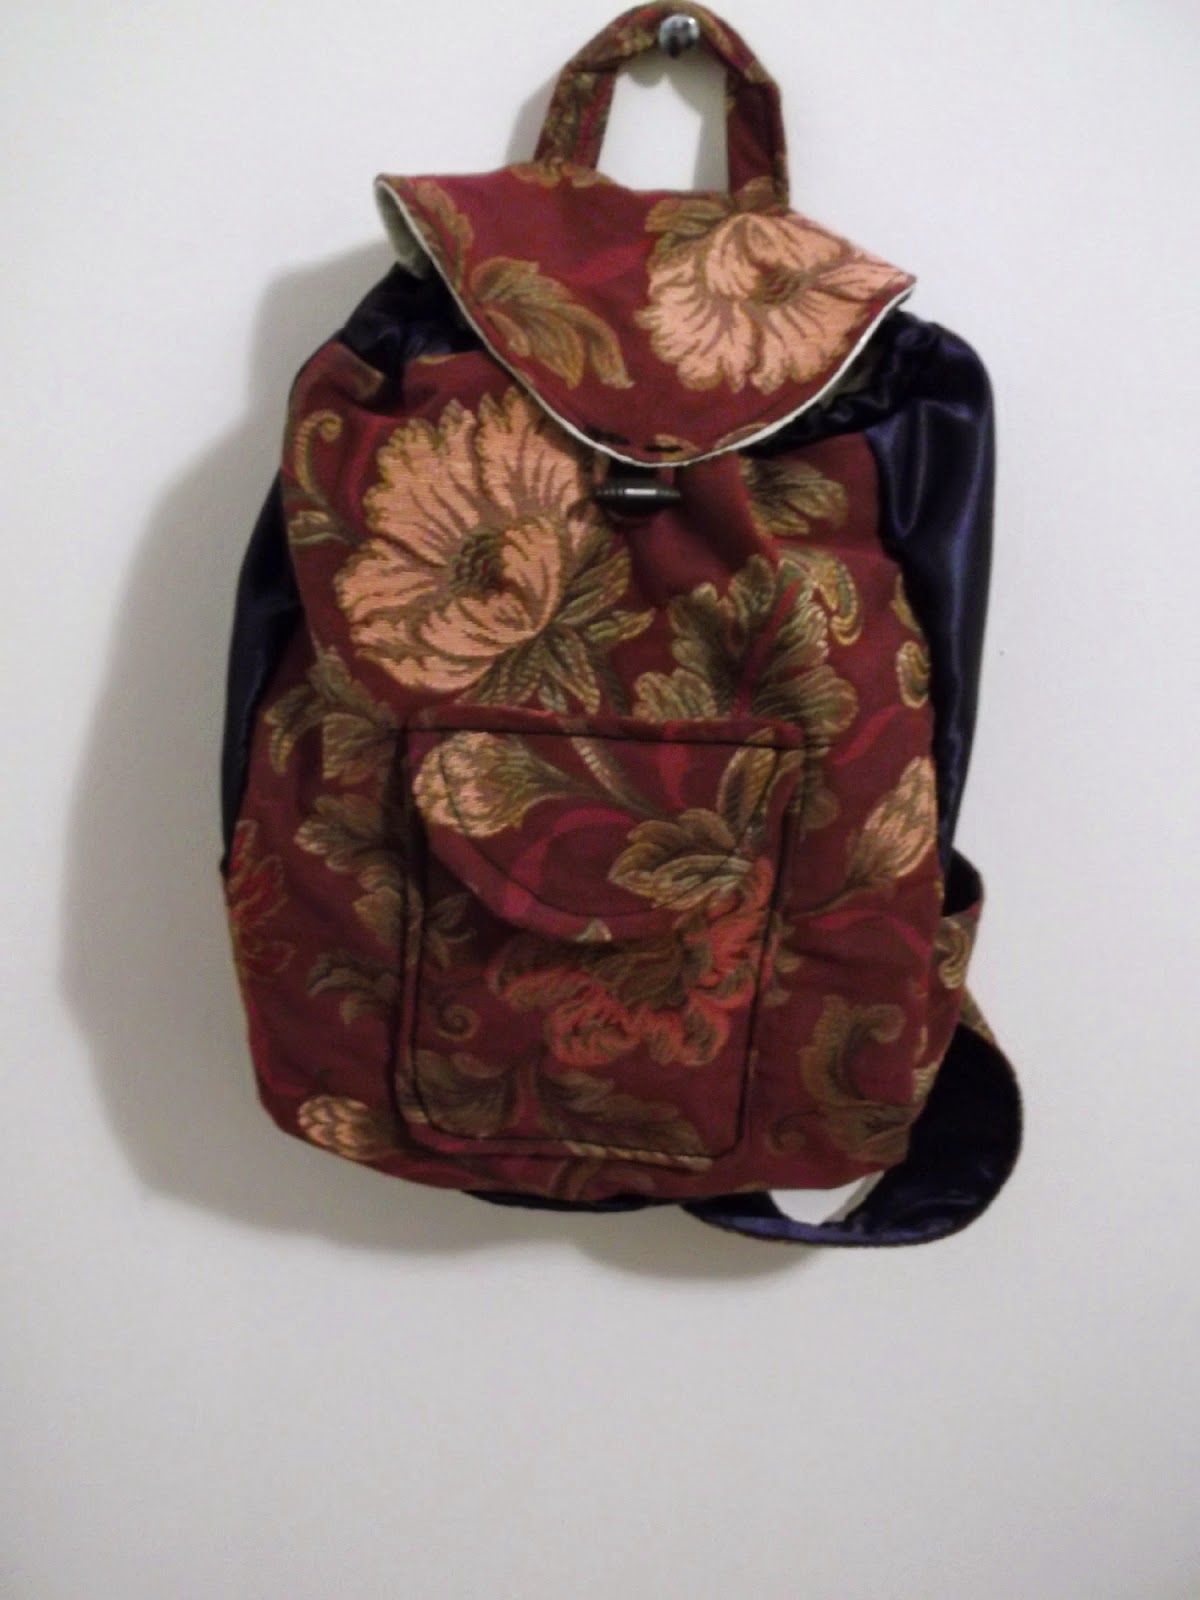
Project Photos: Fancy One Strap Backpack

Image
Okay, so it's been awhile since I have posted any real projects, but I've been busy crafting for my ren faire outfit. This is my first time going to one of these events so I pretty much started from scratch. Everything has been rolling along and falling into place, and now I'm finally ready to start posting some pictures. I'll start with my bag: This backpack is made from the fabric I had after making the dress. It wasn't really part of the plan, but the thought of this fabric languishing in a drawer unused was too much. I started hunting around for smallish projects that I could make and I stumbled across this pin on Pinterest. It brought me to this tutorial.  The fact that I was working with scraps meant that I had to dig into my stash and tweak the pattern to really make a project this size work. It feels good to create something like this without buying a single thing! The red brocade came from the underskirt. This one is my favorite fabric, but it was...

Embellished Tassels for Embroidered Bag

Image
The medieval embroidered pouch that I wrote about here needed a little something extra to make it complete. Even before I started on this project, a row of little coordinated tassels was up on the agenda, but the thought of making them was intimidating. After cruising around on Pinterest several times looking for tutorials, I thought I had the general idea down, and set about making a few simple tassels. The tops of my tassels were frankly, a bit of a mess. Fortunately I planned to cover up that sad poof with this DIY .  Even more fortunately, I started trying to make my fancy buttonhole stitched top on a throwaway tassel (above). It took a lot of sewing and unsewing, stitch tutorial videos and frustration, a process that did some damage to that poor gray thing. Finally I figured it out, and got down to the real business of making my delicate looking black tops. Here you can see the unfinished top of one of my green tassels along with the embellished ...